In the previous ForkLift versions we have added multiple new features. In this blog post we are going to show you how some of these features work. Make sure to update to the latest version to access all of the following features. To update, select ForkLift > Check for Updates from the menu and update if there is a new version.
Option to claim the upgrade bonus
In ForkLift 4.0.6, we have added the option to claim the upgrade bonus. The upgrade bonus is only available to users who own a license to a previous ForkLift version but weren’t granted or haven’t claimed an upgrade bonus so far. You can find a thorough explanation about that option in this blog post.
Calculate All Folder Sizes
It has been possible to tell ForkLift to always calculate sizes through the View Options Panel (Command-J) but always calculating all sizes can consume lot of resources. It has also been possible to calculate the size of the selected folders from the File menu. Starting from version 4.0.6, a new feature allows users to calculate all folder sizes by selecting File > Calculate All Folder Sizes from the menu. The sizes are only calculated in the current location, if you change folders, the sizes won’t be calculated again. Calculate All Folder Sizes shows up in the File menu only if no items are selected in the active pane. If an item is selected, you can deselect it by holding down the Command key and clicking the selected item.
Custom favorite icons
As a new feature, you can add custom icons to your favorites. You can add a custom icon when creating or editing a favorite.
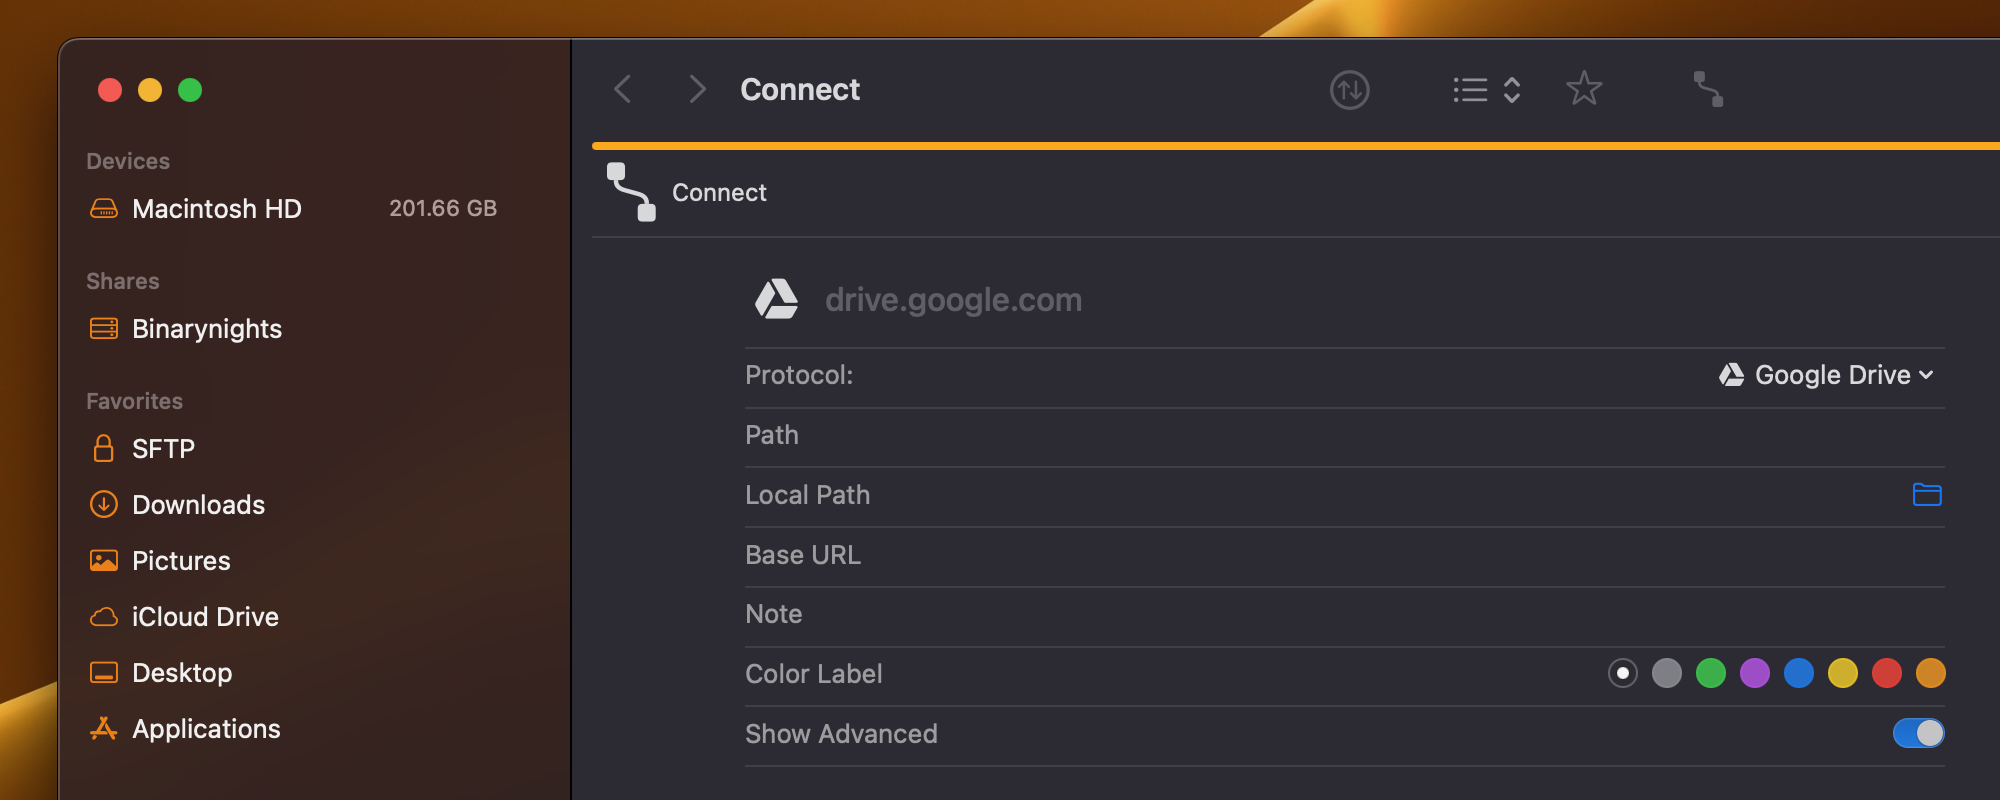
Create a new favorite from the Connect Panel and select a custom favorite icon:
- Open the Connect Panel with Command-K or from the menu: Go > Connect
- Select the protocol that you want to use. – All protocols have their default icons, which you can see in the drop-down menu and which appear at the beginning of the first line next to the name of the connection.
- To change the icon, click the icon next to the name (placeholder).

- From the pop-up, select the icon you want to use. If you want to go back to the default icon, then click the “Use Default Image” button at the bottom. If you have chosen the right icon, click outside the pop-up.
- You can change the color of the icon by selecting a color label. To access that option, make sure to turn on the advanced settings by toggling the “Show Advanced” option.
- Enter the credentials of the connection and click “Add to Favorites”.
Edit an existing favorite:
- Right-click the favorite in the sidebar and select “Edit”.
- To change the icon, click the icon next to the name.
- From the pop-up, select the icon you want to use. If you want to go back to the default icon, then click the “Use Default Image” button at the bottom. If you have chosen the right icon, click outside the pop-up.
- You can change the color of the icon by selecting a color label. To access that option, make sure to turn on the advanced settings by toggling the “Show Advanced” option.
- Click “Save”
If you use Control-Click as the secondary click, then you can’t edit a favorite by right-clicking it inside the sidebar. In that case, select Favorites > Show Favorites from the menu. Select the favorite you want to edit and click the Pen button at the bottom of the pane to edit the favorite. After editing the favorite, you can close the favorite manager by pressing the ESC key on your keyboard.
You can also create a favorite by dragging an item into the sidebar or by selecting an item and selecting Favorites > Add to Favorites from the menu. During that process, you can’t select a custom icon. To change the icon of such a favorite, follow the above steps to edit the existing favorite.
Revert the custom favorite icon to the default icon:
If you want to go back to the default icon, then edit the favorite by using the above steps and instead of choosing a custom icon, click the “Use Default Image” button in the icon selector pop-up and save the favorite.
Print files
One of the new features introduced in version 4.0.7 is the option to print files from ForkLift. This is pretty straightforward, select the items you want to print and choose File > Print from the menu or use the Command-P keyboard shortcut.
Open with section
The addition of the “Open with” section has been highly requested in the past. We are pleased to announce its inclusion in ForkLift, enabling users to seamlessly change the default app without having to switch back to Finder. This feature allows users to specify the app they wish to use for opening selected files or file types.
The “Open with” section can be found in the Info Window, which you can either access in the Preview Pane of ForkLift by selecting the “i” icon at the top of the pane, or in the stand-alone Info Window, which can be opened with the Command-I shortcut, or with the Get Info command from the File menu or the right-click context menu of an item.
When there is at least one app on your Mac capable of opening a specific file type, a default app is assigned to that extension for opening it. But it is possible that you want to open a selected file or all files with the same extension with a different app. Now, you can select that app in ForkLift in the “Open with” section.
You can change the app which should open the selected file by selecting a different app from the drop-down menu inside the “Open with” section. If you click the “Change All…” button below the selected app, you can change the default app to open all files with the same extension.
Edit columns by right-clicking the column headers
Another new feature is the option to edit the columns by right clicking the column headers in list view. The column headers are below the path bar, on top of the columns in list view and tell you which info is displayed in each column, such as Name, Size, Date Modified, or Tags.
 Depending on what info you want to see, you can add or remove columns inside ForkLift. In the past, that was only possible through the View Options Panel (Command-J or View > Show View Options) but now it is also possible inside the panes.
To add a new column:
Right-click anywhere inside the column header and in the right-click context menu, click the name of the column, you want to add to ForkLift. (The currently displayed columns are marked with a check mark. Click one of the unmarked columns to add it.)
To remove a column:
Right-click anywhere inside the column header and in the right-click context menu, click the name of the column, you want to remove from ForkLift. (The currently displayed columns are marked with a check mark. Click one of the marked columns to remove it.) The Name column can’t be removed.
It might be useful to know that you can reorder the columns by grabbing them at their column headers and drag and dropping them to a new location. ForkLift remembers these changes and accordingly reorders the columns inside the right-click menu as well. The position of the Name column can’t be changed.
Default View Settings
When you change the columns in one tab/pane, then the columns don’t automatically change in all other tabs. You should either make the same changes in all tabs, or you should save your current settings as the Default View Settings and then restore those in other tabs as well.
You can do that by selecting View > Save View Settings as Defaults from the menu and then selecting View > Restore Default View Settings from the menu in a different tab. Saving view settings as the default view settings doesn’t mean that ForkLift opens new tabs using those settings. ForkLift always duplicates the view settings of the currently active tab when a new tab is being opened. If you want to use the default view settings, then open a new tab and select View > Restore Default View Settings from the menu.
Sorting order of columns
The default sorting order of some columns has also changed. The default sorting order of the Size and Date columns has become descending, which means that the biggest and latest files are displayed on top by default. ForkLift also remembers the last used sorting order and restores that after you order by a different attribute and then switch back.
Sidebar Editor
We have added a Sidebar Editor to ForkLift to allow users to hide or display individual favorites or favorite groups directly in the sidebar. You can enable the Sidebar Editor by selecting View > Show Sidebar Editor form the menu.
You can deselect favorites by unchecking the boxes in front of their names. This way, it has become possible to hide the entire Shares section or individual shares on the network. That is especially useful in big offices, where there can be hundreds of shares on the same network. Users usually don’t want to see all of those available shares, especially if those are constantly connecting to and disconnecting from the network, which makes the Shares section expand and contract, causing a visual distraction.
You can put back hidden favorites by checking their boxes again.
 The Connections section can’t be hidden from the sidebar.
You can close the Sidebar editor from the menu by selecting View > Hide Sidebar Editor.
Since the introduction of the Sidebar Editor, it has also become possible to hide individual favorites from the sidebar (without opening the Sidebar Editor) by right-clicking them in the sidebar and selecting “Hide from Sidebar”.
New languages
We have added Spanish, Italian, Ukrainian and Polish localization to ForkLift. The language automatically changes following the order of the preferred languages inside the System Settings under Language & Region. You can also set a custom language for ForkLift under System Settings > Language & Region > Applications.
New theme
A new dark theme called “Polar Night” is available under ForkLift > Settings > Themes.
We hope these new features enhance your experience with ForkLift. Try them out today and let us know what you think!
Download ForkLift
 Binarynights